What happens mechanically under leash tension?
Every leash pull generates a tensile force T — determined by the dog's mass and acceleration, not by the attachment system. Collar or harness: T remains physically identical in both cases.
The difference lies in the load path. With a collar, force travels from the leash via the D-ring onto the band, then as circumferential pressure onto the contact area at the neck. The decisive quantity is A — the contact area. What a wide dog collar – what does that mean? actually achieves mechanically at this point is the foundational definition to start from.
The model captures the relationship in a single equation: P ≈ T / A. Pressure is not force. At constant T, P decreases as A increases.
Two model limits apply from the outset: the model assumes homogeneous pressure distribution and a rigid cylinder with ≈ 180° contact arc. Real collars deviate from this because edge effects and material deformation occur. What the model delivers: a quantifiable basis for understanding how strap width affects pressure.
Contact area and width as a geometric parameter
In the cylinder model, contact area A follows directly from strap width. For a neck circumference of 40 cm and a contact arc of ≈ 180°, the relationship is: strap width × half neck circumference = contact area. A 20 mm strap gives approximately 20 cm² — a 40 mm strap gives approximately 40 cm².
The table below shows calculated mean surface pressure at 100 N tensile force for four strap widths in the idealised cylinder model.
| Strap width (mm) | Contact area A (cm², model) | Mean pressure P at 100 N (N/cm²) |
|---|---|---|
| 20 | 20 | 5.0 |
| 25 | 25 | 4.0 |
| 30 | 30 | 3.3 |
| 40 | 40 | 2.5 |
Doubling strap width from 20 to 40 mm halves mean surface pressure in the model — at identical tensile force.
Model calculation based on Barklin Governance Values: T = 100 N, A₁ = 20 cm², A₂ = 40 cm², idealised cylinder model (≈ 180° contact arc).
Strap width is therefore the directly controllable geometric parameter in the collar system. Pressure distribution on a dog collar describes the pressure model in greater depth. For long, slender neck profiles — as found in sighthound types — neck geometry limits the geometrically available contact area, which makes strap width selection mechanically especially relevant.
As diagram 2 shows, the relationship P ∝ T / A holds regardless of the system — strap width is the directly controllable geometric parameter.

The relationship is linear: double the contact area, half the surface pressure. This holds as long as T remains constant and the contact arc does not deviate significantly from 180°.
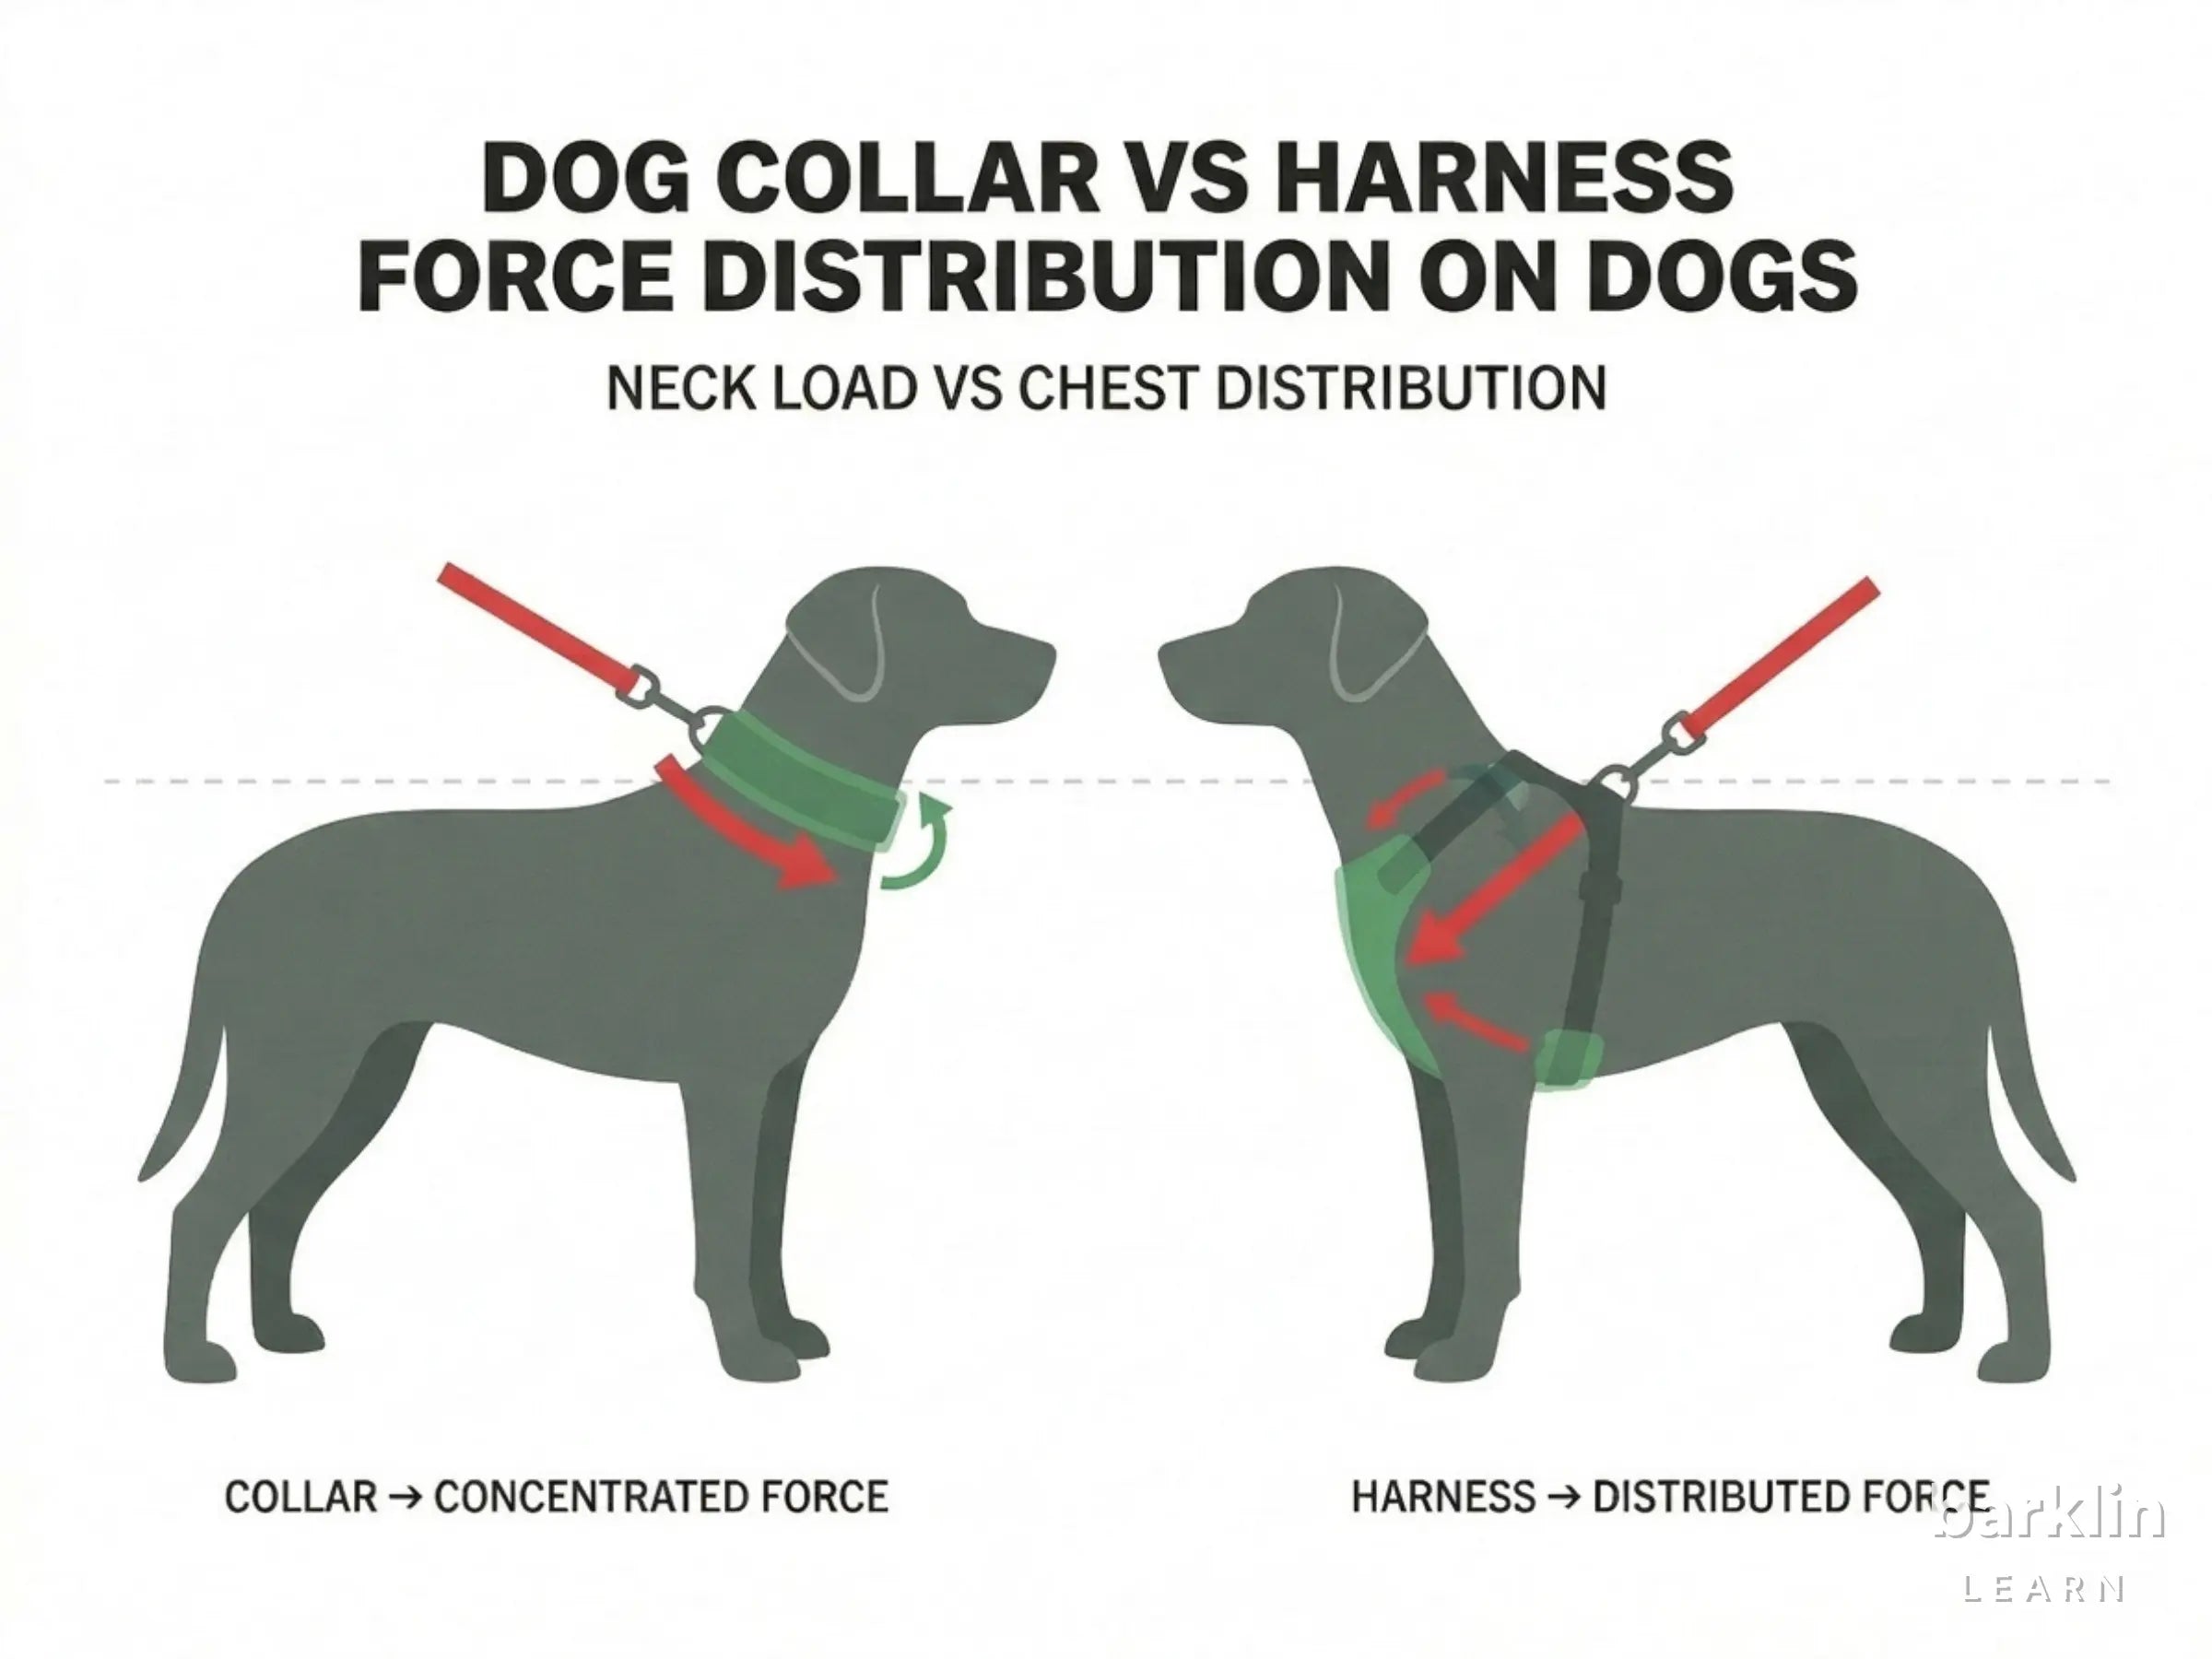
Load path and pull angle – why geometry decides
With a collar, the load path runs through four defined steps: leash → D-ring → band → circumferential pressure at the neck → reaction force from the body. With a harness, the same forces travel differently: leash → attachment point → strap structure → thorax → reaction force. The point of application shifts from the neck to the chest.
That is the structural core difference.
If contact area (A) doubles at constant tensile force (T), mean surface pressure (P) halves in the idealised model. If the load path shifts from the neck to the thorax, the point of application changes — not the force.
Pull angle θ also influences the resulting force direction at the neck. Humans typically guide the leash from above at an angle, generating horizontal and vertical force components. This creates a moment M = T · r at the neck, where r is the moment arm. With a narrow contact zone and a steep leash angle, this moment amplifies the local pressure point.
The model identifies three structural distinguishing features between collar and harness: point of application (neck vs. thorax), contact area (width-dependent vs. design-dependent) and redirection geometry (direct vs. strap-guided). Whether a harness is "better" than a collar cannot be answered categorically from these mechanical parameters alone.
Structural comparison: collar vs. harness
| Parameter | Wide collar | Harness | Relevance |
|---|---|---|---|
| Point of application | Neck (circumferential area) | Thorax (strap area) | Determines pressure zone |
| Contact area | Width-dependent (strap width × arc) | Design-dependent (strap count × strap width) | Determines mean surface pressure |
| Redirection | Direct (leash → D-ring → neck) | Strap-guided (leash → straps → thorax) | Determines load path length |
| Pull angle sensitivity | High (moment arm at neck) | Lower (wider distribution) | Relevant with steep leash angle |
Collar and harness in structural comparison
Both systems differ mechanically along precisely the three parameters the model identifies. The table below compares the mechanical structural parameters of both systems — without assessing which system is "better".
| Parameter | Wide dog collar | Dog harness |
|---|---|---|
| Point of application | Neck (circumferential area) | Thorax (strap area) |
| Contact area | Width-dependent (strap width × contact arc) | Design-dependent (strap count × strap width) |
| Redirection | Direct (leash → D-ring → collar) | Strap-guided (leash → attachment point → multiple straps) |
| Pull angle sensitivity | High (moment arm at neck) | Lower (wider force distribution across torso) |
| Load path length | Short | Long |
Tensile force remains physically identical in both systems — what differs is geometry, point of application, and area distribution.
With a harness, contact area is not defined by a single strap width. Y-type and H-type harnesses differ in strap count and strap geometry; the resulting bearing area on the body is design-dependent. The model does not allow a direct pressure comparison between collar and harness.
As diagram 3 shows, T remains identical in both systems — contact area and point of application differ.

Load path length is greater with a harness: more strap elements, more redirections, more degrees of freedom in force distribution across the torso.
What the contact area means for system selection
The model yields two mechanically distinct options. Anyone wanting to increase contact area at the neck chooses a wider collar — strap width is the directly controllable parameter for A. Anyone wanting to shift the load path entirely chooses a harness; the point of application moves to the thorax.
Both decisions change the geometry. Not the force.
For long, slender neck profiles — as found in sighthound types — the geometrically available bearing area at the neck is limited. A wider collar increases contact area in the model. A harness shifts load to the thorax. Which solution fits depends on individual neck geometry and leash-pulling behaviour, not on a blanket system recommendation.
Load type plays a further role: static tensile load and dynamic impulses differ substantially in mechanical terms. Static and dynamic load on a dog collar analyses these differences in detail.
The choice between collar and harness is not a question of "better" or "safer". It is a question of load path, contact area, and individual body geometry. For the next level — fit control and size matching — the reference is: How should a dog collar fit?
System boundaries
The model describes mean surface pressure under idealised geometric conditions.
Outside its scope are dynamic impulses and peak loads, fit deviations in real-world use, sport or high-performance load scenarios, and detailed pressure-distribution modelling beyond the simplified width-based approach.
| Topic out of scope | Further reading |
|---|---|
| Individual anatomy and tissue compressibility | Dog neck anatomy ↗ |
| Material elasticity and friction | Dog collar: leather or nylon? ↗ |